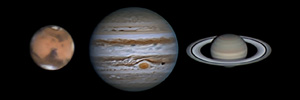
After the capturing step you end up with a fairly large movie file (e.g. an avi file) with thousands of frames. The next step is to create a single stacked image. The stacking software reads in the movie file and with some user input it will produce a single 16-bit stacked image (typically a .tif or .png file). That single stacked image can then be used for the final processing step.
Capture file
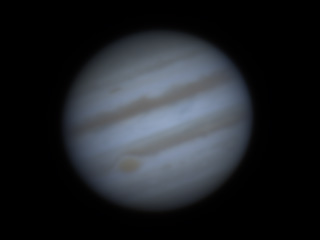
Stacked Image
For stacking software there are two popular choices: RegiStax 6 and AutoStakkert!3 (aka AS!3). The stacking software will discard the low quality frames in your movie file and align the remaining images and more or less take the average of them.
In the beginning there was only RegiStax. RegiStax will do both the stacking and processing steps. Then came AutoStakkert which is easier to learn and does a better job at stacking but that is all it does. Most everyone doing planetary imaging will recommend that you use AS!3 for stacking. Many people then use RegiStax for the processing step and possibly other image processing software as well. The wavelet processing capability of RegiStax 6 is amazing.
You can download AutoStakkert here. You can learn how to use it here. If you need help with AutoStakkert there are plenty of options. There is a Solar System Imaging & Processing forum on Cloudy Nights. There you can find this long running thread dedicated to AutoStakkert. You can read through it and find lots of helpful advice. Feel free to ask a question there or create a new post on the forum. There is also an AutoStakkert Yahoo Group you can join. The author of AutoStakkert, Emil Kraaikamp, still actively supports AS!3 and new versions come out periodically. He will see your questions on Cloudy Nights and the Yahoo Group but hopefully someone else will answer your question so Emil can spend his time making AS!3 even more awesome.
AutoStakkert!3 is now out. This thread on Cloudy Nights is all about AS!3.
Stacking with AutoStakkert!2
AutoStakkert is fairly easy to use. In fact it is as easy as 1, 2, 3. After pushing button #1 you select your movie file and then button #2 becomes enabled. Then you push button #2, wait, but then button #3 is still disabled. You must have some align points (APs) before button #3 is enabled. If you’re new to AutoStakkert then here is what works for me. Check the Replace check box so every time you press the Place AP grid button it will start from scratch. Keep trying different sizes until you end up with between 10 and 20 align points. You may need to add an align point or two to make sure you have every bit covered.
In the video I go through all the parts of AutoStakkert that I understand, or think I understand. The video is nearly a half hour long so here are links to start the video in different places.
00:00 The Beginning
- Selecting Bayer pattern for color cameras
- Opening the movie file
- Offsetting planet to see moons to the side
- Batch processing
- Cropping to increase speed
03:26 Image Stabilization
- Surface vs Planet
- Dynamic Background
- Image stabilization anchor
- Improved Tracking
- Expand vs Cropped
06:34 Quality Estimator
- Gradient
- Noise Robust
- Edge
- Local vs Global
11:58 Reference Frame
- After pressing Analyze
- Last Stack is Reference
- Auto Size
- Quality graph
- Frame slider
14:05 Stack Options
- TIF PNG FIT
- Number of Frames to Stack
- Frame Percentage to Stack
- Quality graph
- How many frames should we stack?
- Using the 8 edit boxes
17:07 Normalize Stack
- Sharpened
- Blend RAW in for x%
- RGB Align
19:45 Folder and filename
- Save in Folders
- Prefix
- Simple Filename for Raw
- More file options
23:12 Advanced Settings
- HQ Refine
- Drizzle
- Resample
25:01 Align Points
- Manual Draw
- Deleting a single align point
- Min Bright
- Place AP Grid